In this tutorial, I’m going to show you how to make a simple animated logo. This sort of animated logo is often seen used before films, YouTube videos, or video games.
We will be using the script known as “Inertial Bounce.” You can view the final product here:

1. Create your composition

To create a composition, open your After Effects project, then go to Composition>New Composition. For the purposes of this tutorial, your composition needs to be 1920X1080, with a frame rate of 30 fps, and about 15 seconds long. Technically, however, this can change to accommodate your specific needs. Once your settings are correct, select OK.
2. Draw the circle

Using the Ellipse Tool, draw a circle as close to the middle as you can. (Hold shift to create a perfect circle.) Make sure that your circle has no stroke and a white fill.
3. Place the circle and add keyframes.

Move the circle straight up and off of the work area. Set a keyframe by clicking the stopwatch next to the Position setting (Shape Layer 1>Transform>Position).
Then move the play head further on down the timeline to about 8 seconds.

At this point, move the circle back into the middle of work area. It should automatically create a new keyframe at the point where you made a change. If you test the video at this point, you will see that the circle moves from above down to the middle of the screen.
4. Add the script

Now it starts to get fun! If you Option+Click the stopwatch for Position at this point, it reveals a box for placing text. Copy and paste the following code into that box:
// Inertial Bounce (moves settle into place after bouncing around a little)
n = 0;
if (numKeys > 0){
n = nearestKey(time).index;
if (key(n).time > time){
n--;
}
}
if (n == 0){
t = 0;
}else{
t = time - key(n).time;
}

if (n > 0){
v = velocityAtTime(key(n).time - thisComp.frameDuration/10);
amp = .05;
freq = 4.0;
decay = 2.0;
value + v*amp*Math.sin(freq*t*2*Math.PI)/Math.exp(decay*t);
}else{
value;
}
With this script in place, your video should look like this when tested:
5. Move the keyframe
To fix this problem, we simply move the ending keyframe much closer to beginning keyframe.

In some cases, you may need adjust the values of “amp”, ‘freq”, and “decay” in the script in order to get the exact results you want. However, in this case, moving the keyframe to exactly 15 frames, produces the exact look we are going for!
6. Adding the other elements
To make this thing actually look like a video, instead of just a bouncy circle, we are going to need to add some other elements.
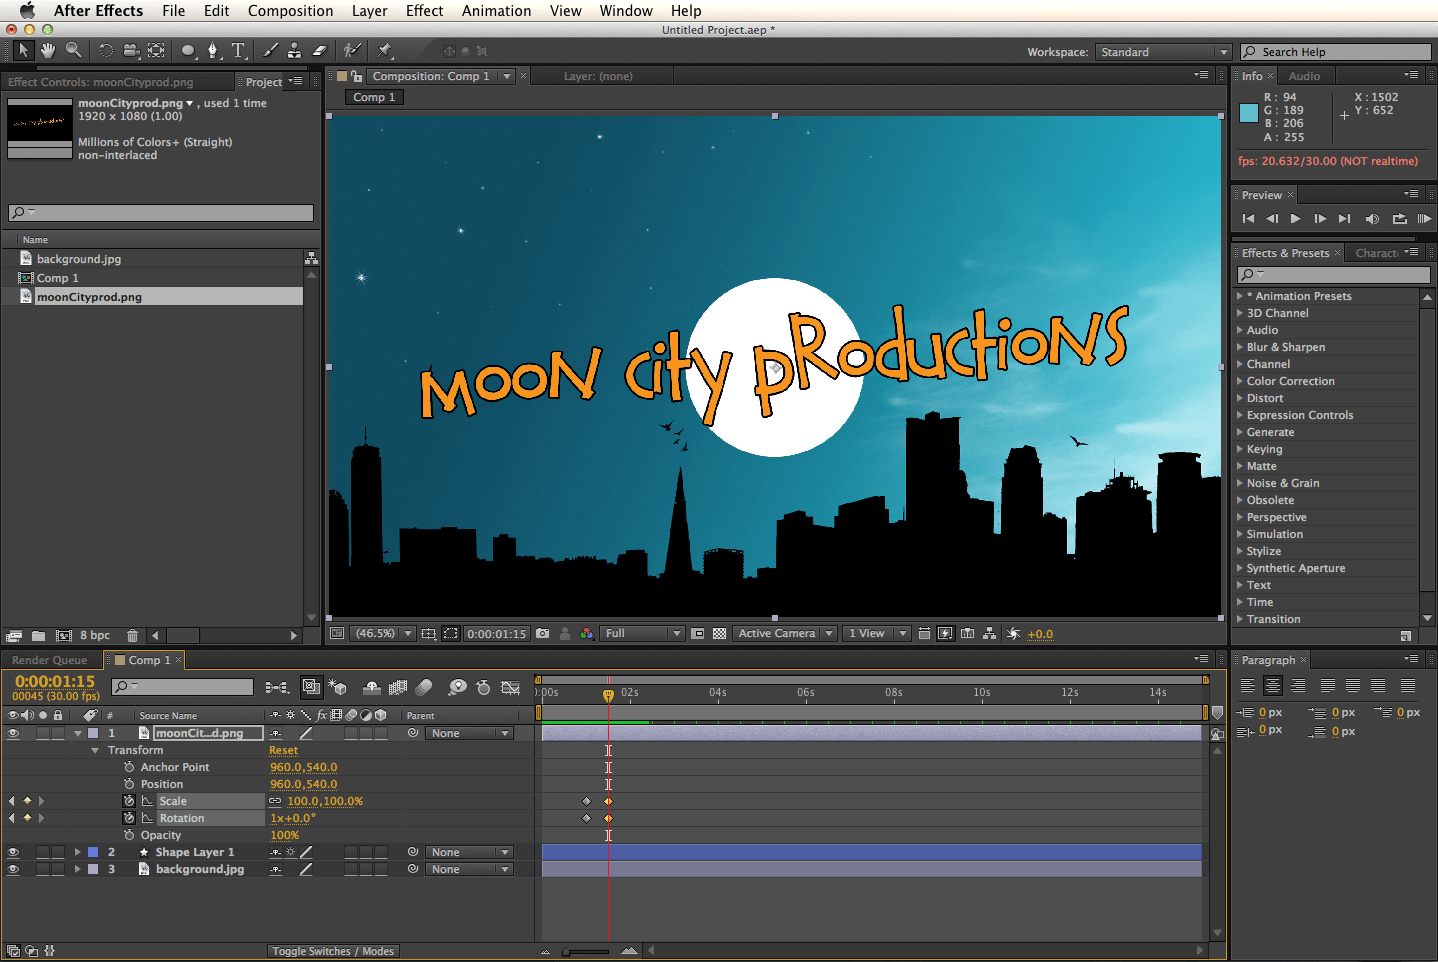
For our purposes today, I have chosen to use this background image I found on Google Images. And this image that I created in Illustrator using this font. I put them together to look like this:
.png)
Now that we have all the pieces together, let’s make the text do some cool stuff as well.
7. Make The Text Do Some Cool Stuff As Well
 Move the play head to the 1 second mark and make a new keyframe for Scale and for Rotation on the text image layer. Set the scale to 0% and leave the rotation as is.
Then move the play head to the 1.5 second mark. Change the Scale back to 100% and set the Rotation to 1x_0.0° (or one full rotation). The new keyframes should automatically appear as you make the changes to each setting.

8. Make The Text Do Some More Cool Stuff
Now Option+Click on the stopwatch for Scale and paste the same script as before into the box.

Then do the same for Rotation, only this time, you need to change the value for “freq” from 4.0 to 1.0.

9. That’s Pretty Much It
You can try a lot of things here by messing with the values of “amp”, ‘freq”, and “decay” in the script for scale, rotation, or position to get slightly different results. You can even add other elements using the same basic script. Some values will work great and others will make the motions jumpy and weird. Play with it and have some fun!
For our purposes in this tutorial, however, those are the only needed changes. Your video should look something like this at this point:
And there you have it, ladies and gentlemen! One “Moon City Productions” animated logo, ready to intro all your “Moon City Productions” videos!